How to collect and submit CWD samples yourself:
Come by a CDFW office to pick up a sampling kit. The sampling kit consists of a data card, two sample bags, and a specimen bag. Or grab a couple resealable plastic bags and use the data card embedded in the How-to-Guide for Chronic Wasting Disease Sampling.
How to remove the medial Retropharyngeal Lymph Nodes for CWD sampling (printable instructions (PDF)).
 Step 1: Position the deer on its back with head and neck fully extended. Where the jawbone ends, find the larynx, this will be the widest part of the trachea just behind the jaw, and your first cut will be just after the larynx. We recommend using exam gloves, a sharp knife and thumb forceps (tweezers). If you wish to preserve the hide, skin or cape the animal first.
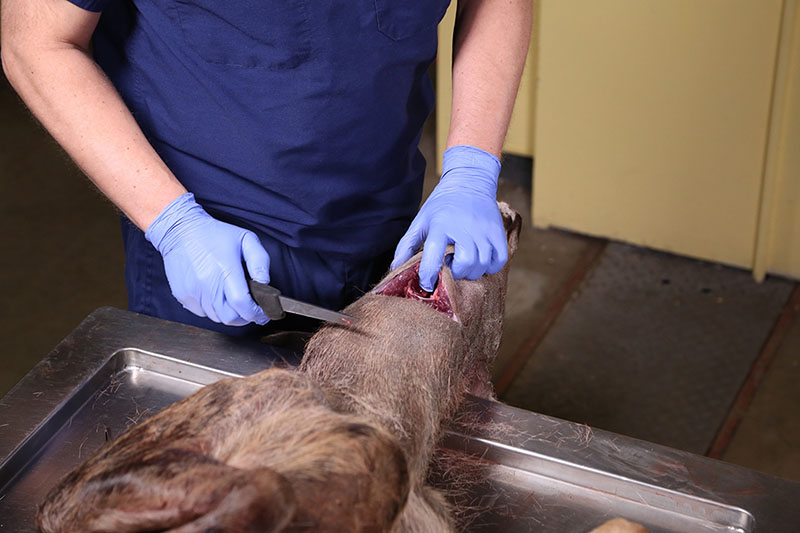 Step 2: Make an initial cut straight down through the trachea, immediately after the larynx. Once through the trachea insert a finger into the trachea and pull it back, towards the nose, as you continue to cut down towards the spine angling slightly back towards the base of the ears.
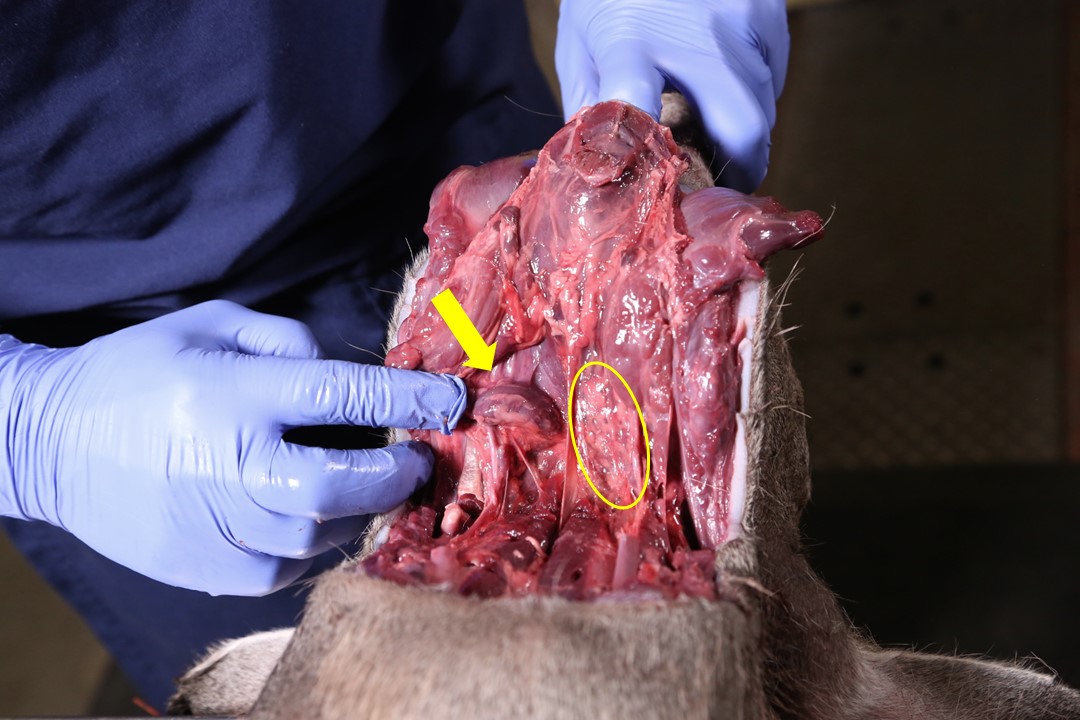 Step 3: Looking down on the completed cut, the lymph nodes (circled in yellow) are exposed. Use a gloved finger to isolate the paired lymph nodes, discrete, semi-firm structures between the size of a nickel or a quarter located on either side of midline often adjacent to the trachea. They should “slip” through your fingers when feeling them. Using just your fingers you can bluntly dissect and pull out the lymph nodes or you can cut them out using a knife and thumb forceps (tweezers). Remove both lymph nodes.
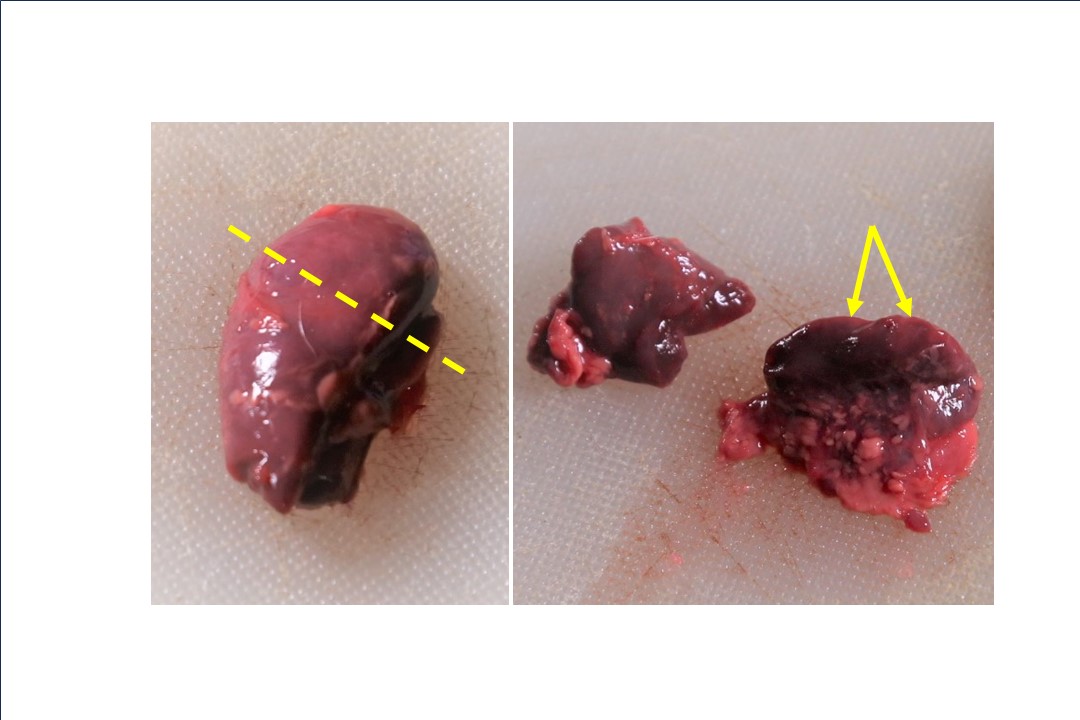 Step 4: To confirm you have lymph node, bisect one along the short axis (dashed line). You should see discrete, lighter colored (often white or tan) areas along the outside edge of the cut surface (arrows). If you don’t see these then you may have the wrong tissue and we may not be able to use it for CWD testing.
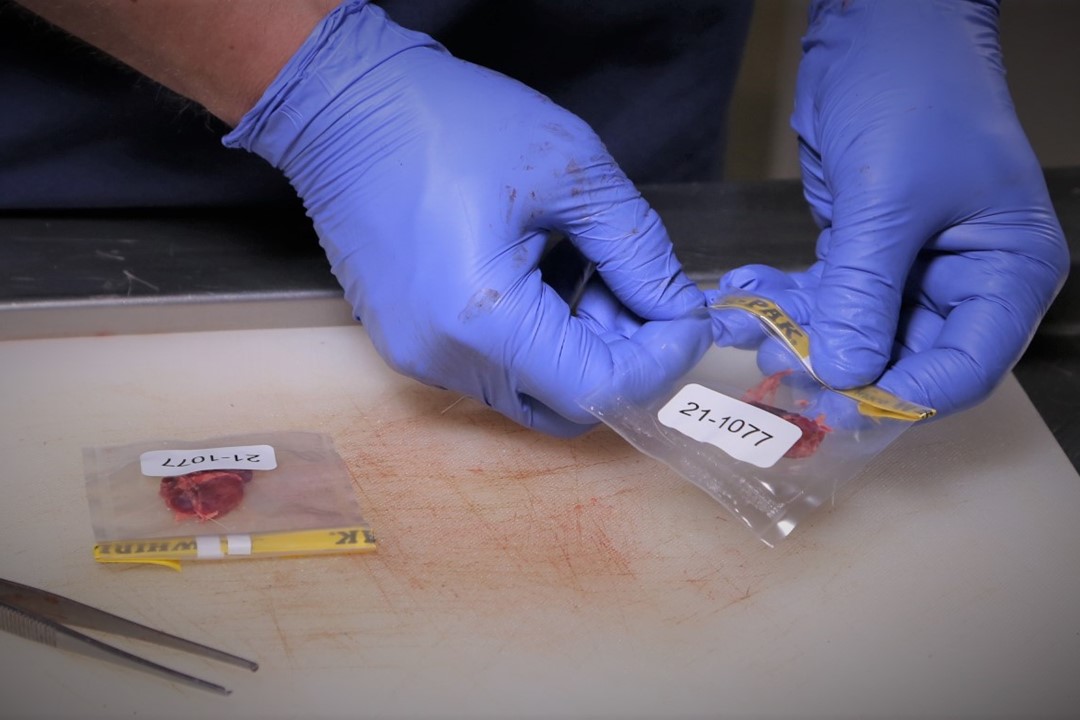 Step 5: Tear along the perforated lines and use the small white tabs to open your Whirl-Pak® sample bags. Place a lymph node into each sample bag. While remove as much air from the bag as possible, carefully roll the yellow wired tab upon itself at least 2-3 time and bend the wire tabs towards the center of the bag to seal it. Place these inside the larger specimen bag.
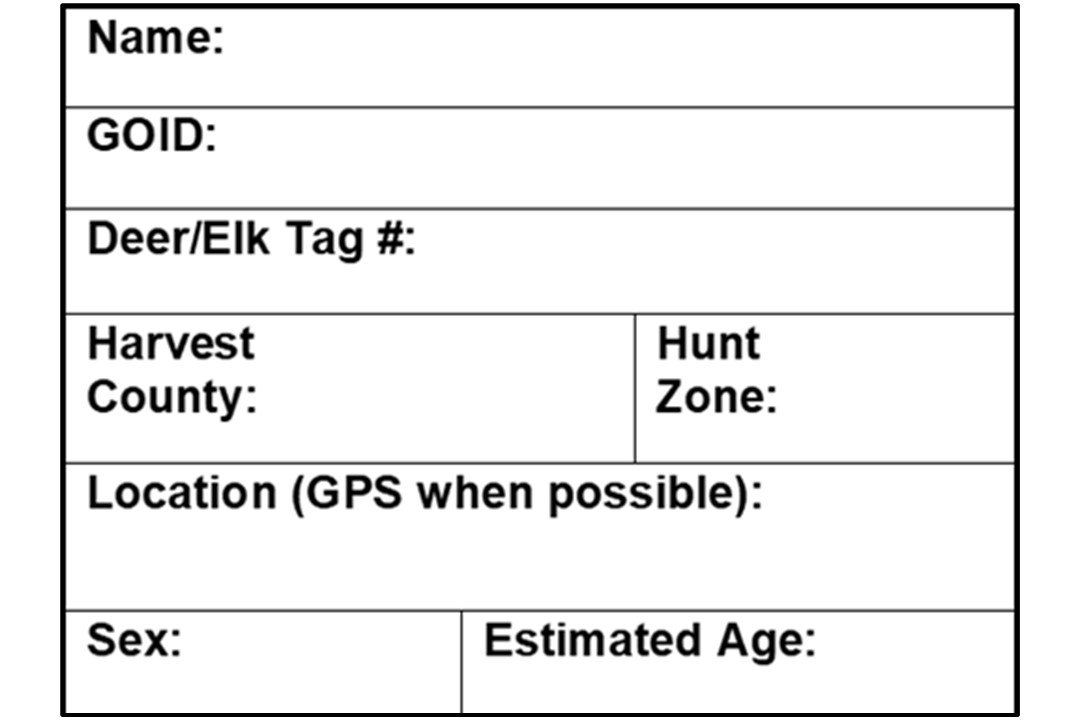 Step 6: Fill out the data card and place it in the outside pocket of the specimen bag. If you did not pick up a sampling kit, you can use two Ziplock® type bags. Place both lymph nodes into one bag and seal it, place that clean and sealed bag into a second Ziplock® type bag along with the completed adjacent data card. Make sure the bag with the lymph nodes in it is relatively clean on the outside and is properly sealed to ensure fluids do not obscure the written data.Click above image to download and print a data card (JPG) if you don’t have one.
Sample handling and submission: Bring the appropriately packaged samples with the completed data card to a CDFW office. If you are not submitting the samples immediately, they should be held frozen until you can get them to a CDFW office.
Find Your CWD Testing Results
For more information: contact us at CWD@wildlife.ca.gov or by phone at (916) 358-2790.